![[9/3/2020] Morpheus & Rangora](https://dpain.dev/wp-content/uploads/2020/08/025.png?w=924&h=0&crop=1)
Introduction
It’s me, JaeHwang Lee.
Due to COVID, we’re switching back to working from home. We’re doing our best to stay safe while also focusing on the working on the updates, and we hope you guys would stay safe as well.
Actual meaning: Actually, we’re gonna take a break at home. Don’t shit on about us playing games at home instead of working.
Today we’re introducing a couple new content for the next month. The major updates are:
- Morpheus & Rangora
- New Chronicles quest lines
- Some quality of life improvements
- Extra housing in Auroria.
Due to the patch being pretty large, we’re not sure if we can actually include all the patch notes that we’re introducing.
Actual meaning: We’re not gonna include the stuff that got bad responses.
The contents we’re introducing are almost finished in development, so if we find any issues during our testing phase we might delay said content.
Actual meaning: It hurts our ego to say that we’re giving up on some changes depending on your responses, so we’re just going to say that we’re delaying said content, and eventually just cancel them when everyone forgets about it.
Meme Reference: http://inven.co.kr/board/archeage/2836/299831?p=3
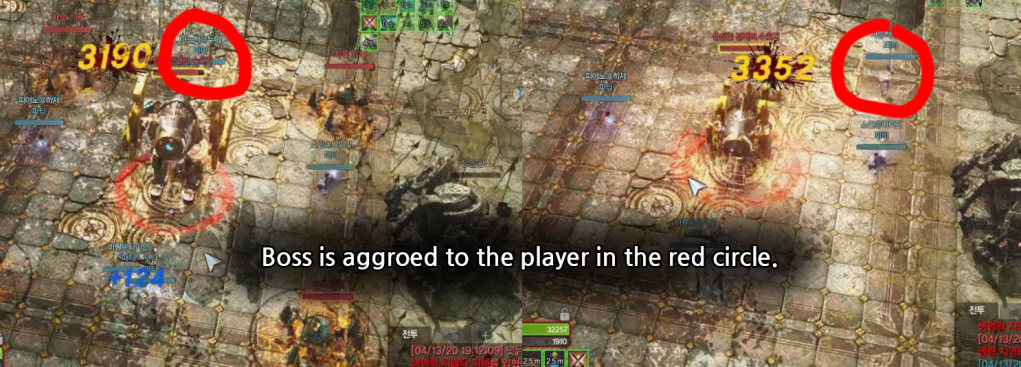
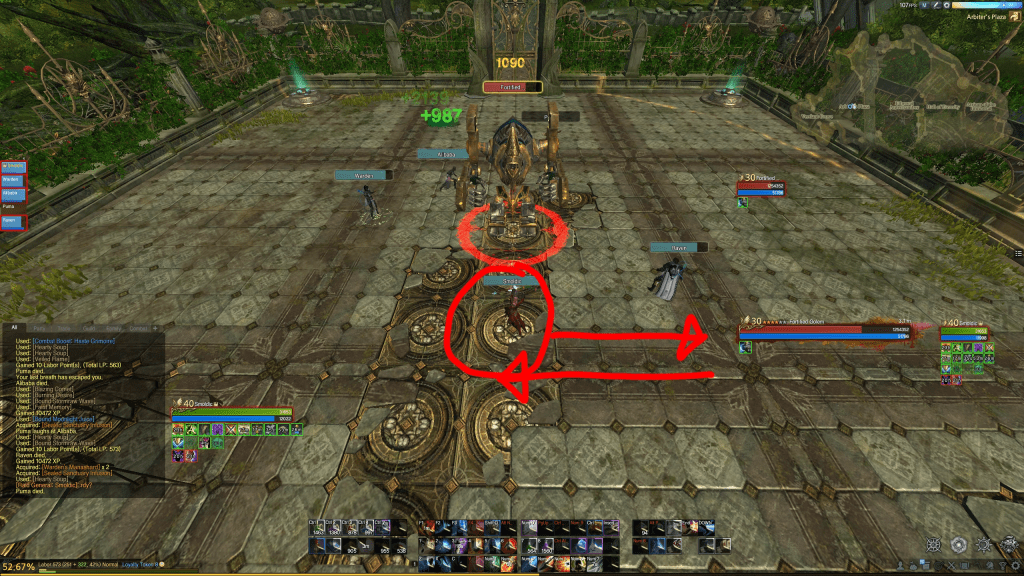
Morpheus & Rangora
Morphues and Rangora should be one of the most well-known raid bosses for all of you. It means that their stories brought a lot of attention to all of you. This update makes these bosses stronger, and will provide a new Chronicle quest line about their stories.
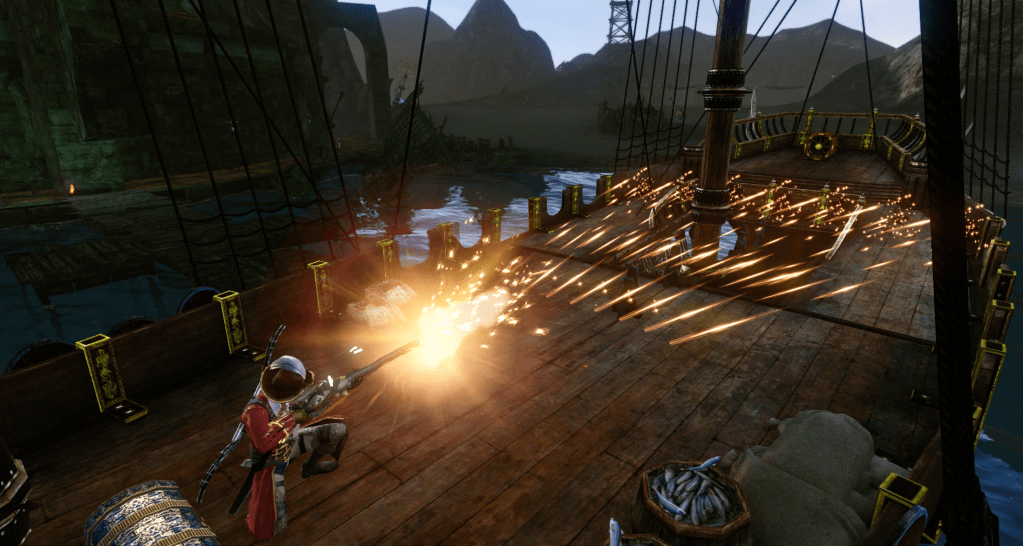
In the past, Morpheus and Rangora’s boat sank, because of Dahuta’s jealousy. As a result, Rangora got drowned deep in the ocean. Finally reaching the Growlgate Isles with a few of his men left, Morpheus was becoming insane, because of the loss of his loved one. All a sudden he heard Dahuta’s whispers that Dahuta would revive Rangora if he sacrifices ten thousand people’s worth of blood.
Eventually Morpheus conquered the Growlgate Isles and immobilized all the island’s pirates. He killed all the people passing the sea, and announced to both factions that he is finding someone that can challenge him. With the automatic cannons he looted from a dwarven trade ship, the bloody Morpheus became even stronger.
Defeating the stronger Morpheus and Rangora lets you get an even better reward than before. Like you expected, you will now be able to awaken your Searing Oath and Cold Anguish to T3.

Chronicle Quests
1. The Insane Aura that flows in the Ocean
This quest line is about Morpheus. Because of Morpheus’ cruel acts, the players get a request from their faction to investigate Morpheus’ past.
But you will be able to what happened between him and his lover, Rangora, once you go through his story when the update comes out.
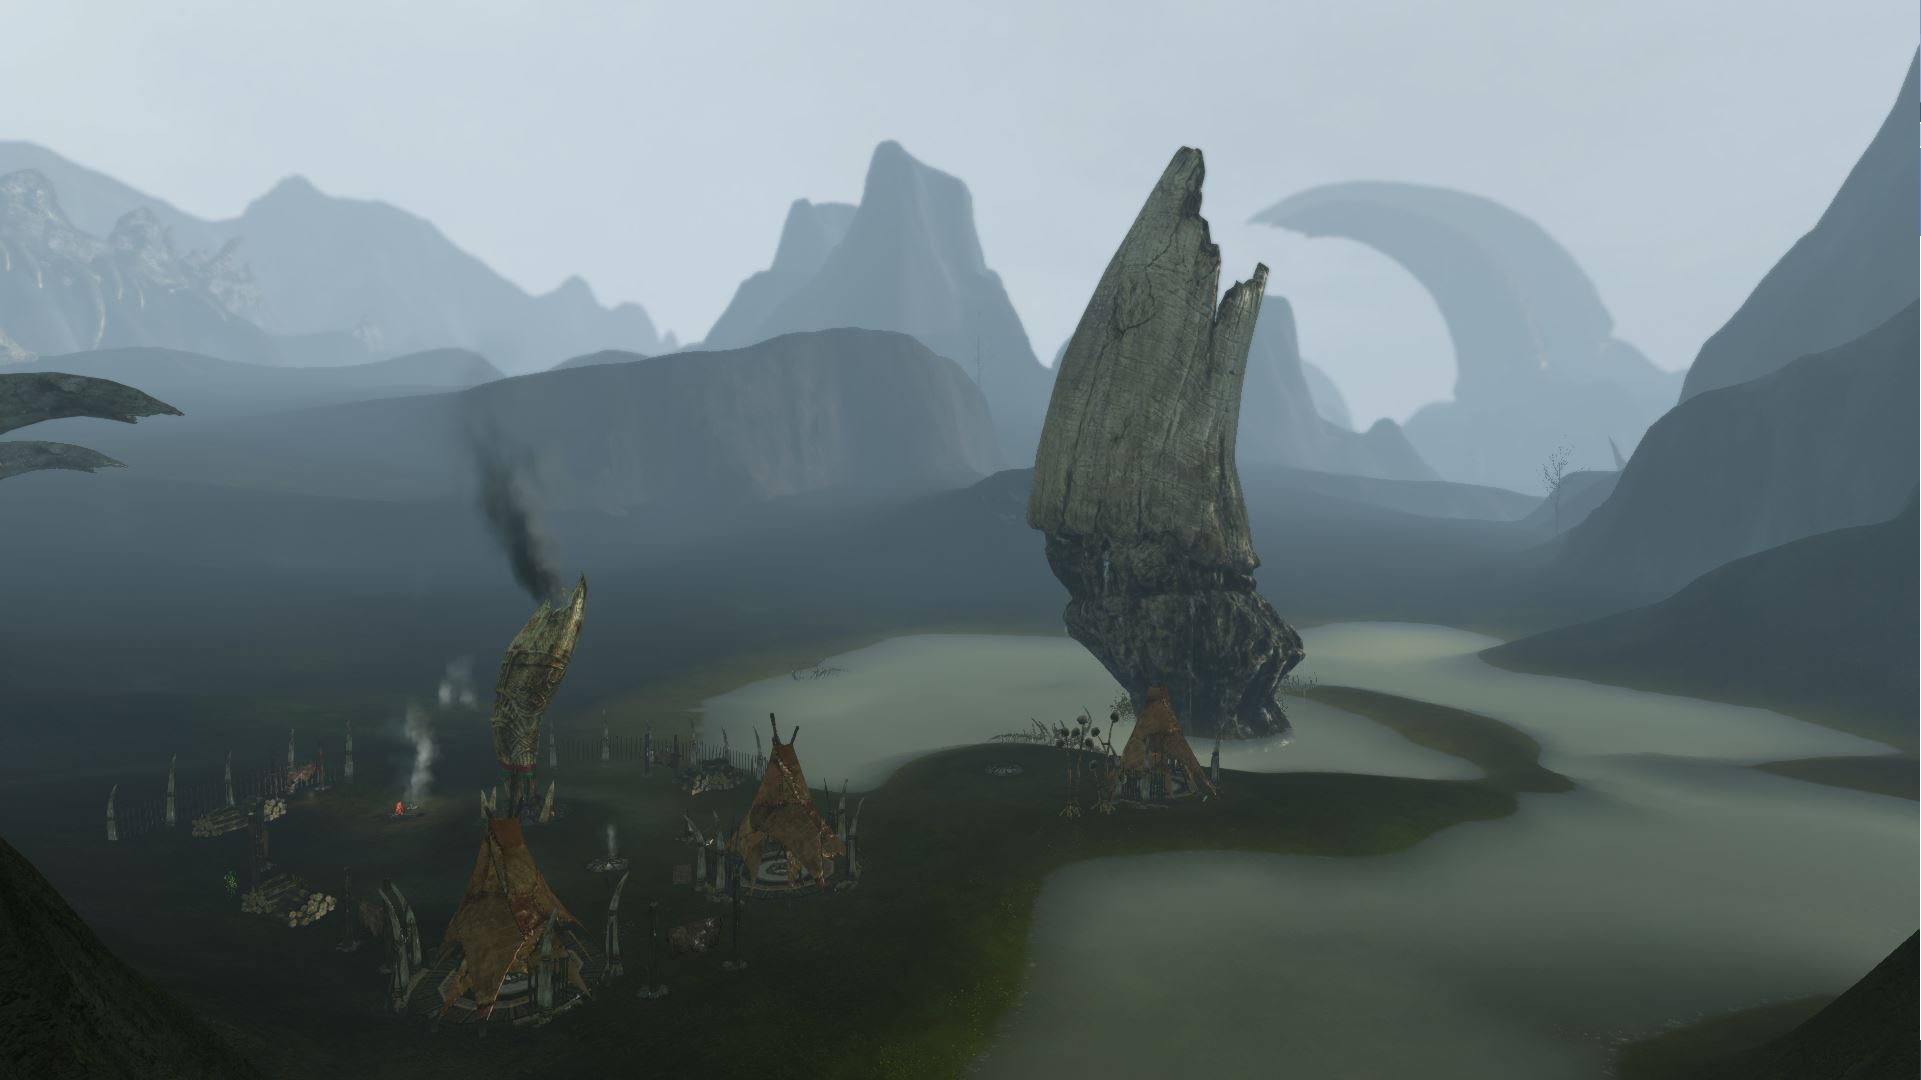
2. The Memory of the Carcass
This quest line starts from a mysterious earthquake that happened in Karkasse Ridgelands. The earthquake triggered many spontaneous phenomenons which leads to forgotten ancient stories. The ancient stories left in scripts and tales lead to the residents in the Karkasse Ridgeland, archaeologists, and the “Ekkihon” (Not sure what this is.) that remembers the war between the dragons and “Nuons”. From this chronicles questline, you will be able to learn about what the secrets left behind from the past dragon and Nuon war by peeking into the remains of the dragons that are left in the Karkasse Ridgelands.
Auroria Housing
1. Additional Housing
Whalesong Harbor, Aegis Island, Sungold Fields, and Exeloch will now have new housing zones, and some areas will get changed to suit the housing zones.
2. Front line Camp
The East and West continent has Community Centers for residents to do a variety of activities. Unfortunately Auroria’s harsh living area does not allow that, and the activities available in Auroria can only be different compared to those in East and West.
The newly added Aurorian housing zones will have a place called the Front line camp that is basically the equivalent of the Community Centers available in East and West. The camps have 3 development stages like the Community Centers, and each stages can do the following:
- Rank 1 Development: Can do resident quests and craft basic supplies.
- Rank 2 Development: Can craft Local specialty packs.
- Rank 3 Development: Can receive a weaker version of the “Strength of the Faction”, and additional resident quests will be available.
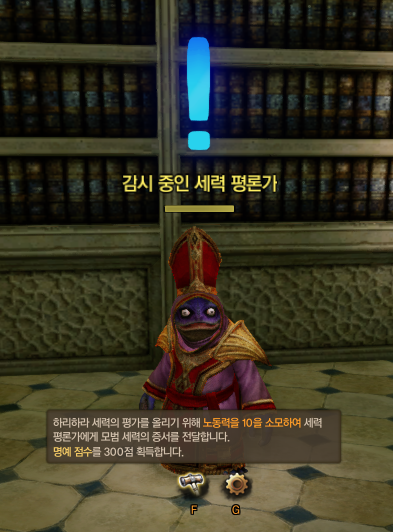
3. Faction Critics
By gaining contribution towards developing the front line camp, you can receive positive reviews from your faction’s critic. Heroes, in this case, will be able to temporarily buff the faction’s statue buff or gain a moral increase effect that will be advantageous during sieges.
4. Aurorian Trade Runs (Inland & Overseas)
The Aurorian expedition has led supplies to reach Diamond Shores from the faction’s mother land, but the supplies generated from Auroria usually never reached back to the East and West continents apart from some of the resources gained from sieges.
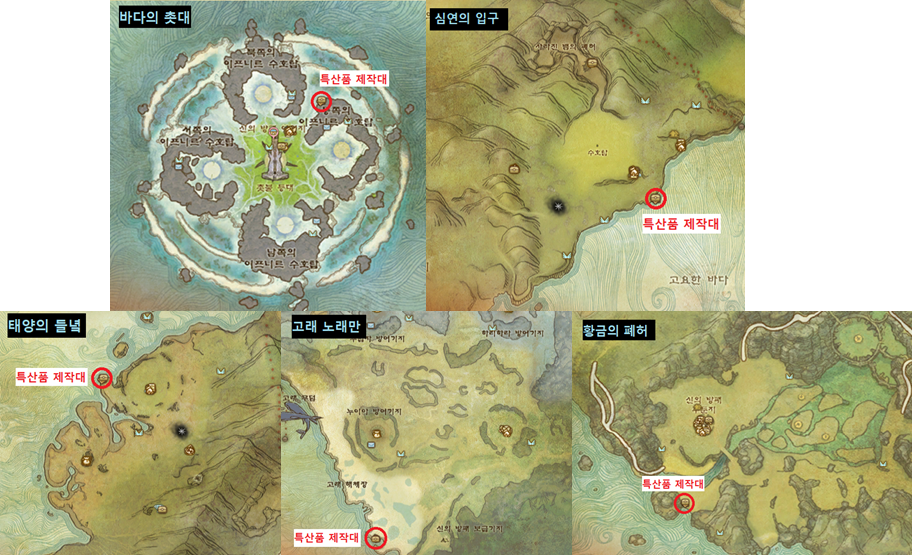
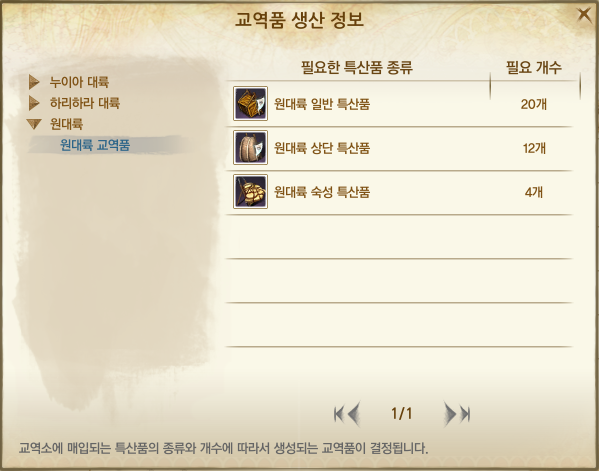
This update lets players make and sell specialty packs, and eventually make cargo runs as well. The whole trade system is identical to the ones in the motherland.
The trade outlet where players will sell local specialty packs and buy Aurorian cargo will be located in Heedmar, but Haranya and Nuia Cargo will only be accepted in the Trade Outlets located in Diamond Shores. (Heedmar is the easiest castle to takeover, so this is gonna be interesting.)
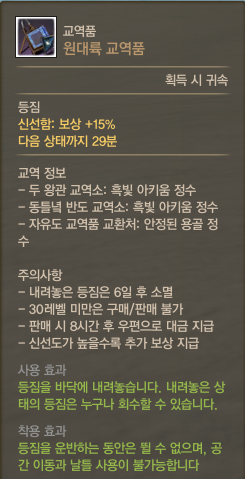
Aurorian Cargo will be accepted in Two Crowns Warscorched Scar Trade Outlet and Austera Port Trade Outlet for Onyx Archeum Essence, and is also accepted in Freedich Island for Dragon Essence Stabilizer. Aurorian Trade runs are more risky than the trade runs in the other 2 continents, so they will yield higher reward.
4. Housing Changes
- Safe zones within Housing areas are removed.
- Players are safe in the land they own. (Includes Auroria, and also during conflict and war time.)
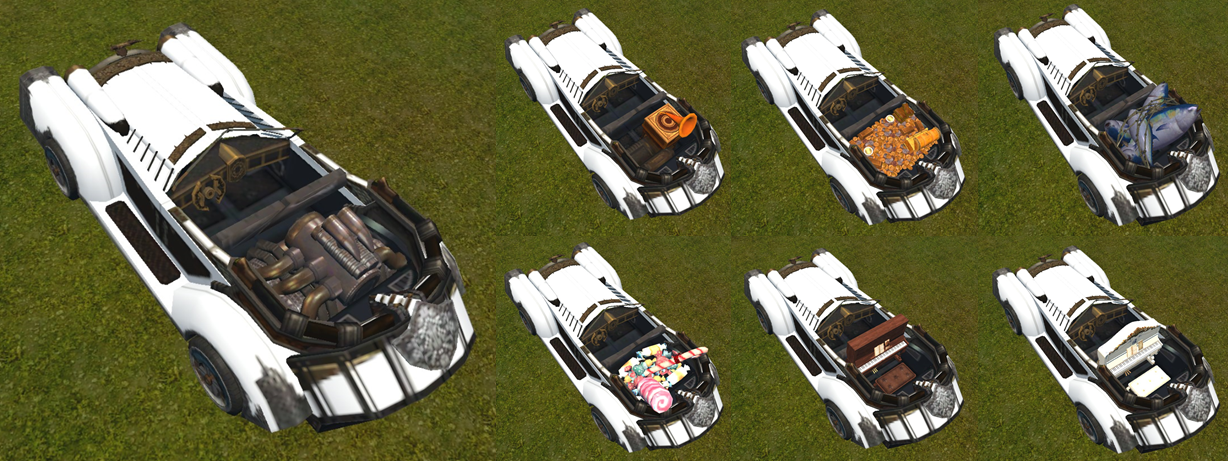
Vehicle Modification
Like we mentioned from the last Amigo post, the B200, and C200 series now have vehicle mods. Owners of the B200s and C200s can now exchange their cars to cars that can equip vehicle mods. The B200 and C200s have slots for the Engine, the frame, and 2 back seats. The 2 back seats can also be replaced for other slots, so get excited.
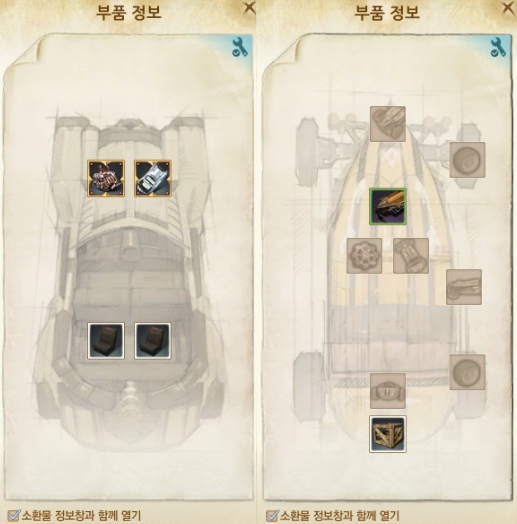
The Timber Coupe series also gets an additional slot at the back, which is only for trade pack storage. Through crafting, you can craft make a Trade Pack Storage exclusive for vehicles. This storage slows down the car, but lets you hold 3 packs at once. I assume this means a B200 can hold a total of 8 packs. (2 front seats, 3 from back seats, and 3 from the trunk.)
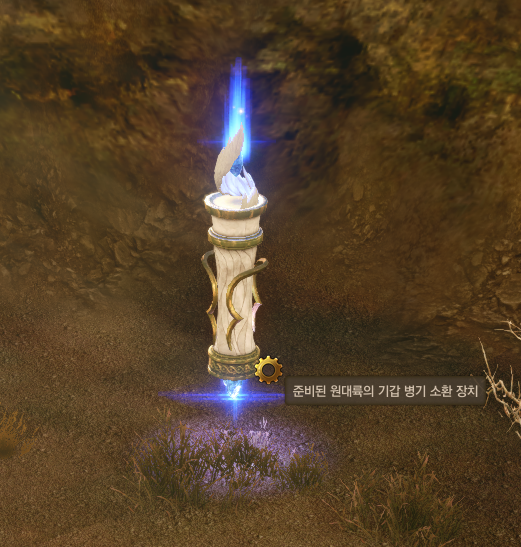
The Magical Lands
Parts of the Mechanoid Chasing event and the Anquish raid will change. Magical Land’s content basically changes into the faction competition, and the faction that wins gets priority to kill Anquish. It’s a similar system to Thunderwing Titan. Oh please fuck no. But unlike having to kill mobs in Reedwind, the faction has to win by killing the Mechanoid first.
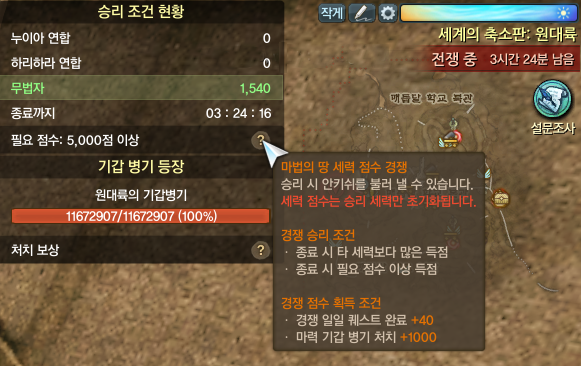
- During wartime, heroes from each faction can spawn mechanoids every interval.
- If the mechanoid is killed within 40 minutes since its spawn, the faction gains points.
- Once Anquish is spawned, the opposite faction will automatically get teleported outside of the zone every set interval. (Not sure what this interval is. Probably means the opposite faction might be able to still contest.)
- Once the faction reaches the goal, Anquish spawns.
- The faction that did not win the event will have restrictions for 10 minutes since the spawn of Anquish. (Which probably means the faction that won gets a 10 minutes head start.)
Apart from those changes above, mechanoids will be able to move more randomly, and will get some additional balance fixes. Also the rewards from the event will give players materials, such as anchoring charms that can be used to enhance their vehicle mods or mats for vehicle mods, so please get excited.
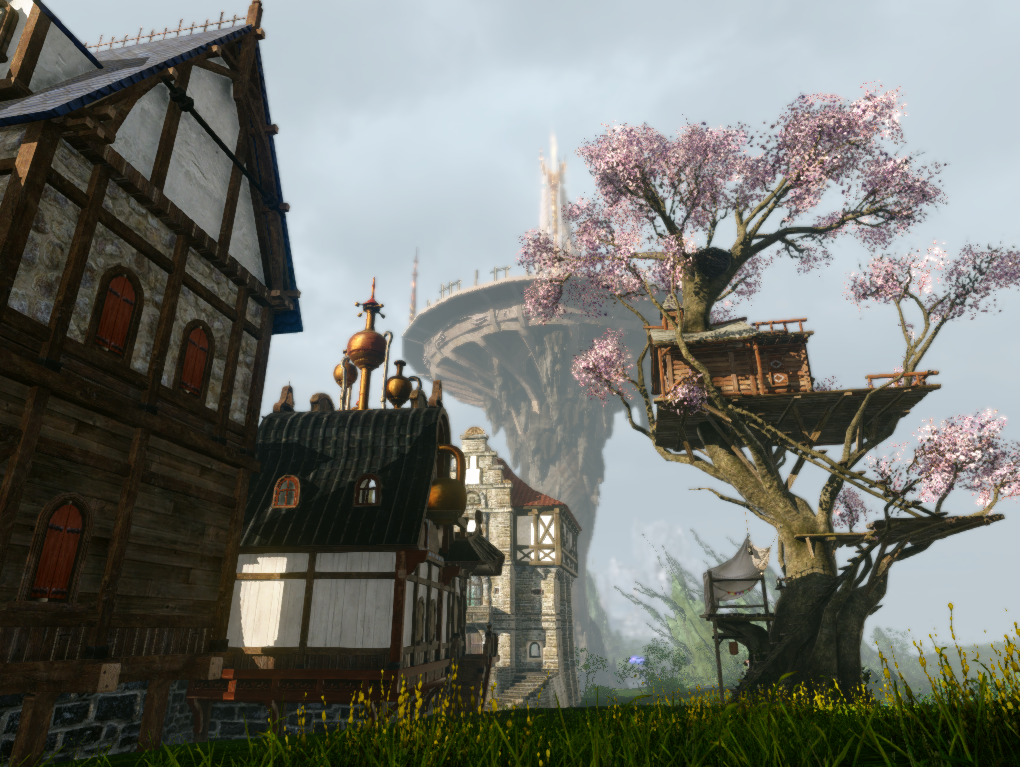
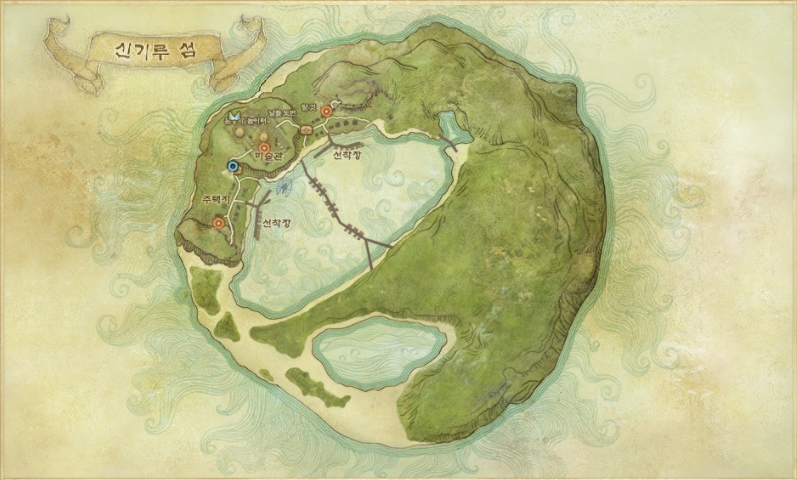
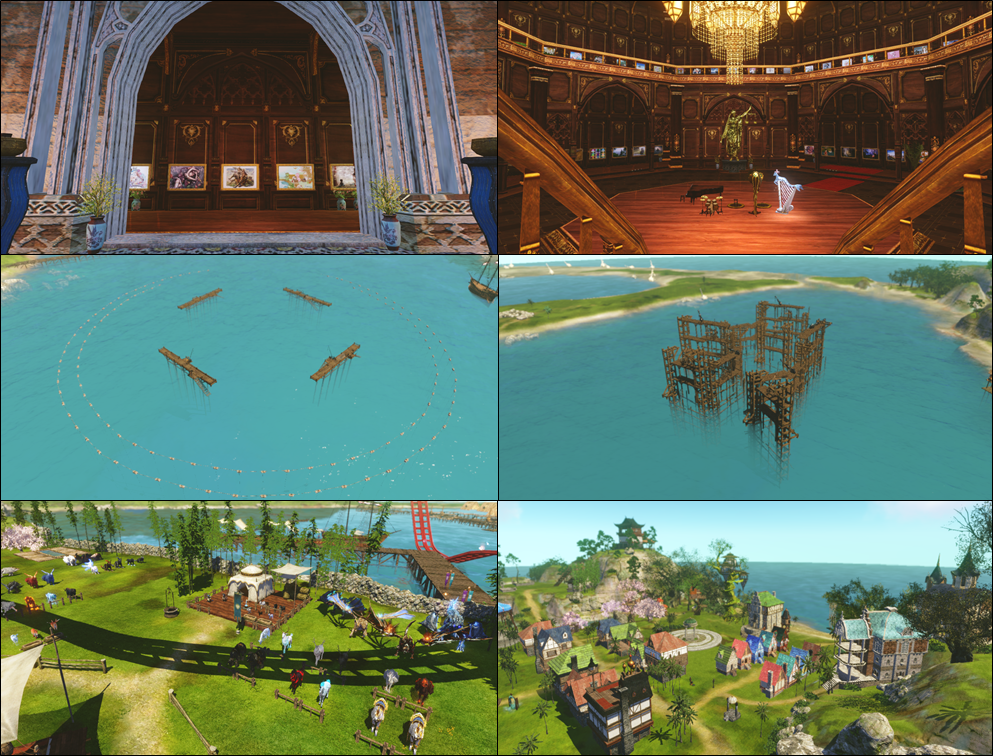
Mirage Isles
Mirage Isles finally gets a renewal, since the game’s release. This update only adds map changes, but future patches will add more events and contents.
Cash Shop
This update also adds some cash shop changes. XL claims they will get rid of gear progression related items from the cash shop and add them as game content rewards. XL hopes they make the game less P2W, and is adding the Archepass to all the servers (including Legacy) to lower the price of new items and make them more available to everyone.
1. Credit Shop Renewal
Items that directly influence gear progression will be gone from the credit shop and will be available from in-game crafting and coin purchases (stuff like Kyrios badges). The type of items that will be removed are the following: regrade charms, tempering charms, luna stones/frosts, stat migration items. The specific list will be available in the update notes.
2. Gamewide Archepass
Archepass requires less cash to be spent, but requires players to continuously play to get the rewards the pass provide on each stages. Some players prefer the system and some don’t. But since the Archepass doesn’t require players to buy items with the full price, XL believes this will help reduce the P2W gap among players. So yeah basically the Archepass will be also available in Legacy servers.
3. More Incentives for Patron & Changed Housing Requirements
- Auction House tax reduction 25% -> 50% (Basically you get the 10% tax back with Patron.)
- Auction House listing fee reduced by 80%.
- Only accounts with Patron can plot housing and pay for tax. (I assume KR wasn’t like this before)
XL believes reducing the gap between cash spending players and adding more rewards for the casual cash spending user aims to solve the same goal. If they increase rewards from cash packages that people will normally buy, it would lessen the impact of players buying other more expensive packages.
XL thought a lot about the housing issue happening in KR. Apparently KR lacked a lot of housing zone, but XL was worried that adding a bunch of housing zones might just cause a small number of people owning all the land (basically monopolizing all the land). So they are changing the system so that only Patroned accounts can plot land. I guess KR’s housing system wasn’t like NA/EU before. Though this is a pretty big change to the KR Patron system, XL is also planning to make Patron cheaper, due to these changes.
This new system also has some flaws that can be bypassed by prepaying taxes, but XL plans to fix those flaws in the future.
(Note) Auction House basic listing fee gets changed from 1~4% -> 0.5~2% (Patron 80% discount changes this to 0.1~0.4%.)
Quality of Life Improvements
1. More Shortcut Bars & Skillsavers
Lots of players have been asking these so finally here they are.

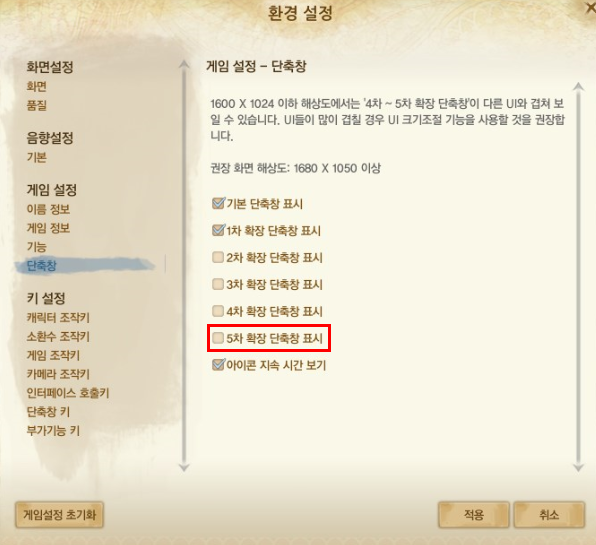
- Skillsavers can now be expanded up to 5.
- Now there are 5 shortcut bars presets to accommodate the 5 skillsaver limit.
- Now there are 5 shortcut bars.
2. Costume Appearance Slot
To equip a cosmetic costume, you need to go through several extraction processes which is quite a hassle.
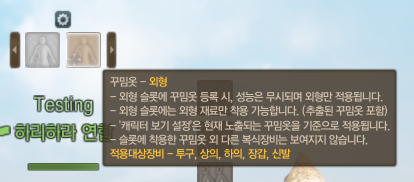
This update lets players just equip extracted costumes without having to fusion it onto a basic costume. Check the specifics in the upcoming update notes.

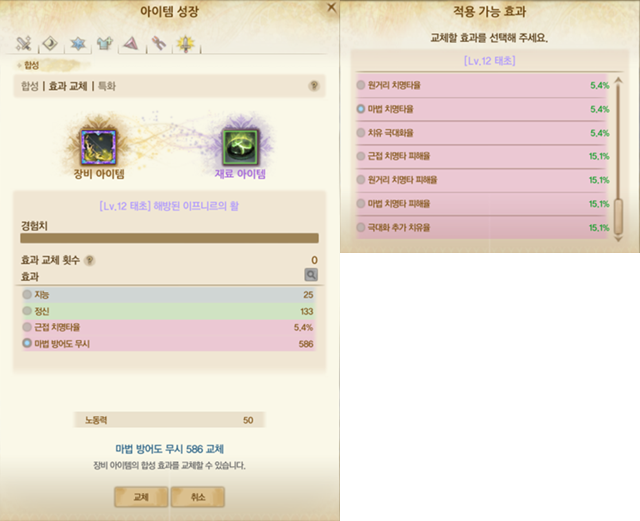
3. Resplendent Serendipity Stone
This item lets you finally choose an effect that you want when replacing synthesis effects. Unlike the original Serendipity Stone, this one basically lets you skip the RNG hassle. This Resplendent version will only drop in Garden during war time with low chance, but will also be available in some packages like the Archepass.
But there’s still discussion going on regarding the item, so finalized details will be in the update notes.
4. Micro Housing
A small housing design is added that can be plotted even on the leftover corner of the housing zones. It’s kind of hard to even call it a house, but it has all the minimum features a house could provide. It can be saved as a portal and can also have a housing fairy assigned to it, and the cost to construct and maintain is the cheapest among all the different types of housing options.

If you weren’t really a potato or if you’re a returning player that can’t really afford expensive housing, definitely try out potato content using this new housing plot with housing fairies.
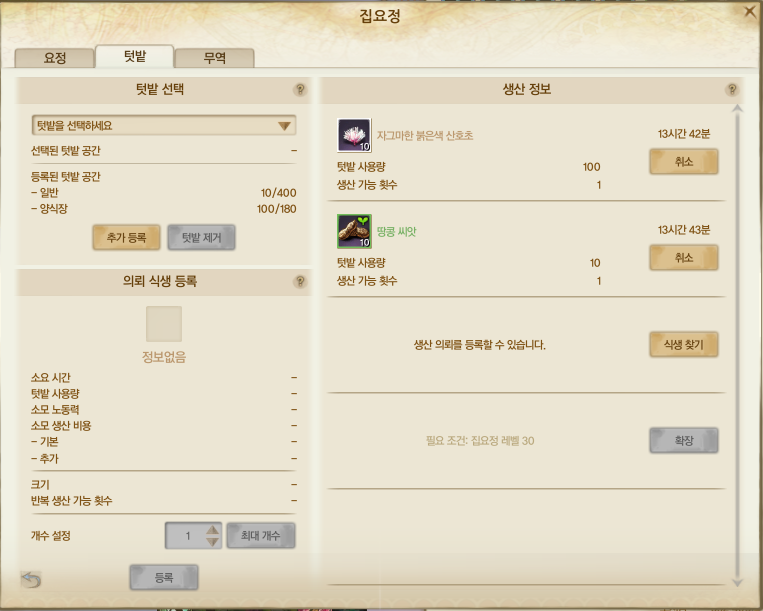
5. House Fairies With Sea Mats
Aqua farms can now be assigned to House fairies. The amount of virtual space the fairy can use will be divided as land plots and water plots. For example, the fairy will use its assigned land plots when growing stuff like corns and peanuts, but it will use its sea plots when growing stuff like corals. Good bye overpriced sea mats 🙂
Conclusion
This Amigo post contains quite a lot of changes even compared to the summer patches, and tests for all these changes are still going on. As a result, not all of these changes might make it during the day of update, but if that happens, following regular maintenance will add the skipped changes.