Ipnysh’s Relic is a new progression system available since 1/14/2021 in KR Archeage. It’s kind of like Maplestory’s Star force system. Basically think of it as a progression where you strengthen your body instead of your actual gear. For example: if you strengthen your chest and grow abs, any chest piece you equip will get some bonus stats.
You can gain mats to upgrade your Ipnysh’s Relic by participating in Mt. Ipnysh quests and these mats are used for both weapon and armor.
Red, Blue, and Green orbs are used for the pieces below. Color coded.
The colored orbs above are used to increase your experience, and the Ewan’s Rune (blue triangle item above) that costs 150 tokens is used to basically tier up your body part.
Body Parts
There are total 16 body parts you can ‘enhance’ in the Ipnysh’s Relic system
3 Attack Body Parts: Right hand Weapon, Left hand Weapon, Bow
6 Support Body Parts:Necklace, 2 x Rings, 2 x Earrings, Instrument
Feeding exp using the mats will let you level up each body part eventually. Every time the piece levels up, it will gain a star⭐. Each body part can go up to 10 stars ⭐.
Increasing the tier of your body part also increases the equipped gear’s gear score, damage, and armor. I’m not sure about the exact amounts, but 5 stars on an 30+ level 10 T3 Erenor Bow increases the DPS from 1177.3 -> 1211.8.
If you reach 5 stars ⭐ on a body part, you get your first synth on your body part, and if you reach 10 stars ⭐ on a body part, you get your second synth stat on your body part. Support body part is an exception. First synth stat is available at 2⭐, 2nd synth stat at 3⭐, and 3rd synth stat which is only available for support body parts is available at 4⭐.The first synth stat on body parts will be normal stat attributes like Str, Agi, Int, Sta, Spi, and the second synth stat you get will be stats like cast time, attack speed, and more. What stat you get when you become that tier is random, so you need to use serendipity stones to reroll them.
Ewan’s Rune
Like mentioned earlier, Ewan’s rune is used to increase your star value on your body part. There are 3 tiers of Ewan’s rune. These tiered Ewan’s rune are used for different tiers of your body part:
T1 Ewan’s Runes are available in the Merchant, but T2 requires 3x T1 Ewan’s Runes and 10x Bloody Scales (Available in the new zone.) T3 Ewan’s Runes require 3x T2 Ewan’s Runes and 30x Bloody Scales.
Set Effect
UI to level up the piece.
Set Effects:
Max HP 2000 & Max Mana 1000
750 Physical & Magical Defense
500 Toughness & 200 Resilience
If you look at the UI above, there are 3 bars at the bottom right each with 3 stars. The top is for attack body parts, 2nd is for defense body parts, and the 3rd is for support body parts. If you exceed the amount of stars necessary as per the UI says, you will gain the respective set bonus. However all three types of body parts needs to have the amount of stars satisfied to get the set effect.
Here are some examples:
If you get 12 attack stars, 28 defense stars, 12 support stars, you’ll get the level 1 set effect.
If you get 30 attack stars, 28 defense stars, 24 support stars, you’ll get the level 1 set effect.
If you get 21 attack stars, 70 defense stars, 24 support stars, you’ll get the level 1 & 2 set effect.
If you get 30 attack stars, 70 defense stars, 24 support stars, you’ll get the level 1 & 2 & 3 set effect.
Got some Ipnysh Sacntuary (Golden Shrine) boss videos that you guys might be interested in. The 2nd boss and the 4th boss are the hard ones with the 2nd boss being the hardest.
Thanks to Kimnuts for making the videos that I referenced to write up the guide!
This room consists of 4 mini bosses that all have different mechanics. Before you start, the runs are much easier if your healer can rez quickly.
1st boss by Kimnuts.
Basic Skills
The boss skills are the following:
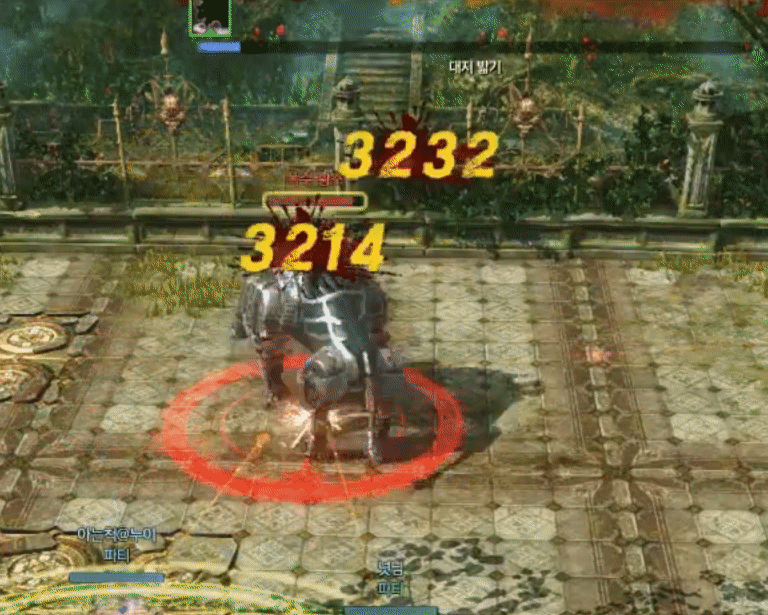
Stomp (대지 밟기)
Tramp Earth
The boss does a couple jumps and the last jump is the high jump. When the Taurus’ last jump is about to land, players can jump to dodge this mechanic. Seems to have about a 15m range.
Charge (돌진)
Spawns a mat and charges.
Melees behind the boss needs to back off when it does the charge. It also hits players that aren’t on the mat if they are behind the boss.
Back Kick (뒷발치기)
As always keep distance from the boss.
Hits targets behind the boss. Pretty simple.
Rear Kick (올려 차기)
Seems like you should always just move away when the boss runs towards you.
Hits targets in front of the boss. Main aggro should avoid the attack using mobility skills like backdrop.
1-1 Agile Taurus
First of all, all the boss skills can be used while standing still and even when it’s moving. It is crucial to make sure you can recognize the actual physical motions of the boss for each of the skills. In future phases, clones of the boss spawn and it’s hard to check their casting bars, so you need to memorize the visuals of each pattern.
This boss is pretty easy as long as you have witchcraft. Bubbles can be used to lift the Rapter mobs (explained below when it spawns) and the nearby towers will kill the rapters for you. Basically you need to dodge the rapters while kiting the Taurus. Honestly, you can do the entire first room without a healer at all. If you die too much, spec defense or spec witchcraft, or get more mobility.
Once the boss has 80% HP, it spawns Rapters that only take 1 damage from your attacks. You need to align yourself so that the boss attacks hit the Rapters. Or you can just lift the Rapters will CCs like Bubble and the surrounding towers will attack the Rapters.
Try not to get lifted, because those towers will also hit you.
Once the boss has 40% HP, it will spawn a clone of itself which disappears in 40 seconds. The clone also can lift you so be careful. The purple traps in the middle lifts you up if you stand on it so be aware.
The easiest way to deal with the clone is to spawn a healing circle right where it’s supposed to spawn and make the clone aggro onto the healing circle at the start. If not possible, you can just ignore it and full DPS the boss.
1-2 Sturdy Taurus
If you get hit by the boss’ Sunder Earth, you will most definitely insta-die. (Unless you have a fuck ton of HP.) The main aggro just needs to move away from the boss and avoid the Sunder Earth.
When the boss hits 70% HP, it spawns suiciding robots. If you hit them, they explode and causes an AOE trip around itself. It’s stationary when spawns, but later on moves, so kill them asap. You can notice that the boss acts up weirdly if the main aggro dies. This is fixed in our version, so do not worry about it.
When the boss hits 40% HP, it spawns a clone that also does the same thing. The clone is immune to damage so it will eventually always get aggroed to the healer. But when it first spawns, it will initially aggro to whoever is closest to the clone. The aggro will eventually change to the healer, so the healer needs to heal while kiting the clone. Again, you can also use healing circle for this clone to dodge the whole mechanic.
1-3 Fortified Golem
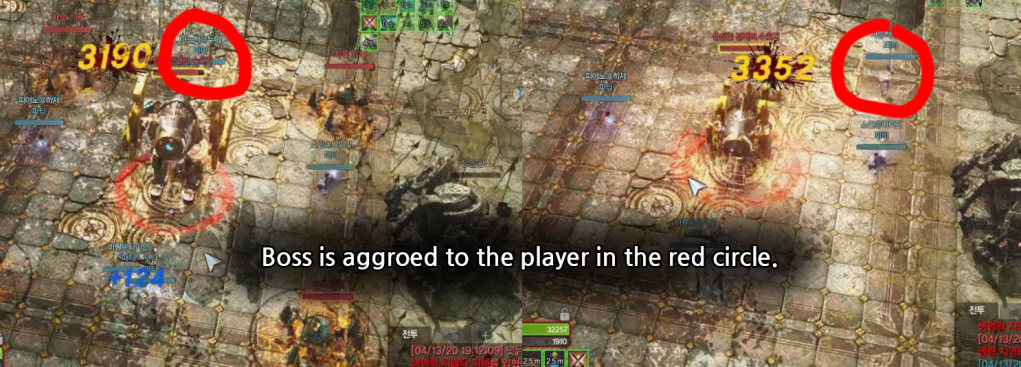
For this boss, you also just have to be careful with the aggro. When the boss spawns, stick to the center of the map, so that the boss doesn’t move to somewhere else.
Stay inside the center quadrant like this.
At the start, out of the 9 quadrants of the map thorns spawn on all the quadrants except the center one. These thorns will trip you if you get hit.
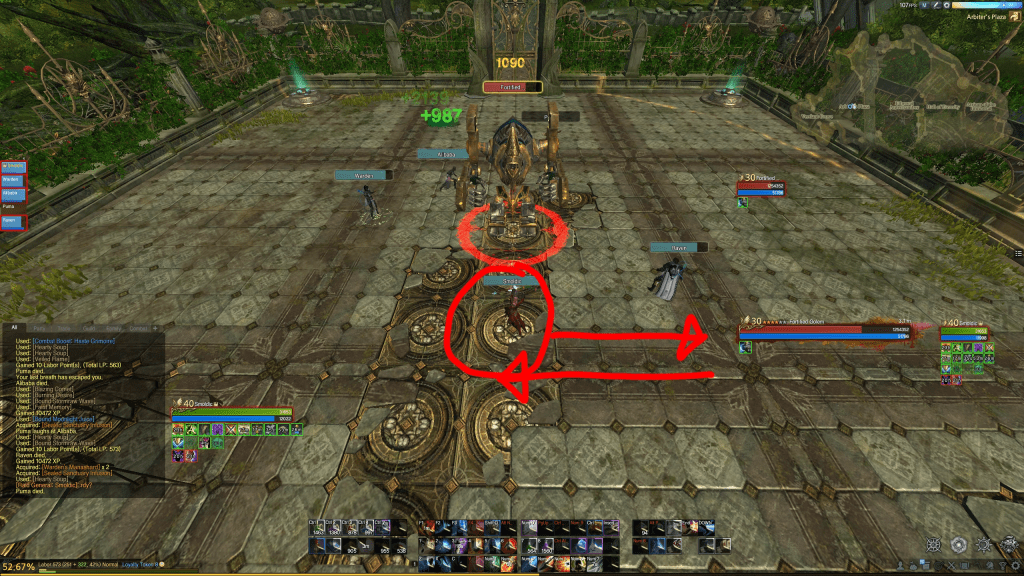
This boss has 2 patterns and you only have to pay attention to one of the pattern. The boss’s normal attack is a shock attack and the boss shoots the attack towards the main aggro. If you get hit by it, you get pushed and tripped, so you need to avoid it by doing long stutter steps. You can see it how it’s done below.
You can see the red circle player is doing long stutter steps to avoid the shock attack.
The shock attack has a mini skill channel at the start and immediately starts a slightly longer skill channel. When the 1st mini channel ends, move to the side. Once the 2nd skill channel ends, go back to where you were.
Occasionally the boss spawns suicide robots on the 4 corners of the center quadrant so stay away from it. These suicide robots seems to blow up when it gets aggro.
When the boss reaches 60% HP, the thorns on the ground swap and only spawns at the center of the map. It also spawns the Mechanoid Hog looking boss clone you saw from 2nd phase of the 1st stage. Like the previous phase, this boss clone only gets aggro from the healer, so the healer needs to kite the clone.
At 40% HP, the thorns now spawn on the outer quadrants, so get back inside. The clone could still be alive depending on the amount of your DPS. If it is still alive, whoever has the aggro of the clone needs to kite the clone. Also again, you can use healing circle to dodge this mechanic.
Suicide bots will now spawn again on the outer quadrants, so a DPS (preferably an archer with missile rain) needs to blow them up to make the healer’s life easier.
During the entire time, the main aggro just needs to kite the shock attack.
How to kite the Shock Cannons
Dodge like this when there’s no mines.Dodge like this when there’s mines on the corner.
1-4 Reinforced Taurus
So finally the 4th phase boss in level 1. Over all the patterns are identical to the 1st phase, but it uses Sunder Earth (that one shots people). Luckily it doesn’t spawn the rapters. Instead is spawns the suicide bots.
At the start, there’s no special pattern. Just look at the boss’ movements and react accordingly.
At 85%, a clone from the phase 2 spawns. Remember you need to pay attention with the clone as they can also do patterns. It can use Sunder
At 75%, 2 clones from phase 1 spawn. As always clones eventually aggro to healers, so its crucial for the healers to position correctly so that the clone attacks don’t hit the DPS.
At 50%, 2 clones spawn from phase 2, but they stay stationary and only uses Sunder Earth. This will one shot you. The best way to react to this pattern is to make whoever aggroed by these clones stay at the middle, so that the Sunder Earths won’t go on some weird direction. This helps your party members significantly, because now people can predict where the Sunder Earths are going to land.
At 20%, 1 clone from phase 4 spawns. It basically does all the patterns. Basically assume that all the clones will to all the patterns, since there’s too many clones in the map. Clones do disappear after 40 seconds since they are spawned though.
Damn the boss is too hard!
Hey, if the boss is too hard, whenever clones spawns, stop DPS entirely and kite patterns until the clones go away. After then, revive the dead, and continue with the boss.
Got some Ipnysh Sacntuary (Golden Shrine) boss videos that you guys might be interested in. The 2nd boss and the 4th boss are the hard ones with the 2nd boss being the hardest.
Thanks to Kimnuts for making the videos that I referenced to write up the guide!
2nd Boss
2 Tank, 2 Healer, 1 DPS by Kimnuts
2 Tank, 1 Healer, 2 DPS by Lulu
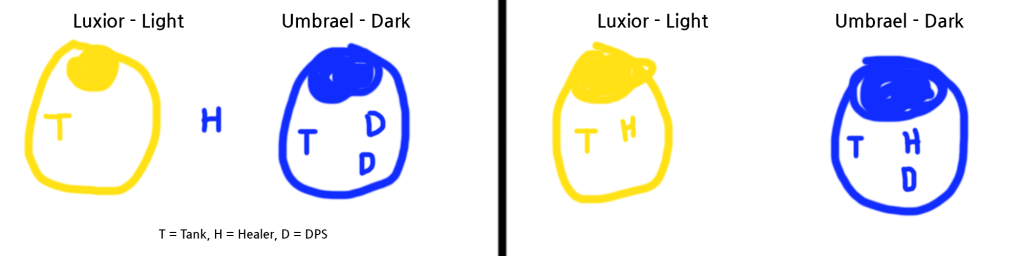
Ah I guess you finally beat the first bosses. Now its Luxior and Umbrael that you need to kill.
Party Composition
In Kimnut’s video, the party has 2 healers, 3 archers. 2 of the archers have shields and specced Defense. Lulu’s video runs 2 tanks, 1 healer, and 2 DPS. Having 1 dedicated DPS with 2 healer adds more stability to the attempt, but slows down the run. Having 2 dedicated DPS with 1 healer speeds up the process, but adds more burden to your healer and it get harder to recover (harder to revive dead people).
I personally prefer a 2 tank (that also can dps), 2 healer, 1 dps party composition, but you can also beat this pretty easily with a 2 tank, 1 healer, 2 dps party. It just requires a different way to approach the boss. As long as your party members aren’t monkeys, the 1 healer comp will work better, because you’ll have more damage for the last boss. (More DPS helps.)
Buffs and Debuffs
Buffs and Debuffs
The first debuff is the timer till it hits Enrage mode. When the boss is in enrage, you basically can’t beat it, because it gains 300% increased damage and 80% received damage. Just reset at the point.
The first buff is the type of the boss. The first buff shows your the type the boss is. Light Warden Luxior is light type and Shadow Warden Umbrael is dark type. If you get hit by the boss with the same type as yourself, you will only receive 1/3 of the actual damage. You also need the same type to react on a specific boss pattern. So it’s important to have two players tanking each of the bosses.
The 2nd buff is the amount of shield the boss has. Both bosses start with 10k shield. If you hit the boss when the shield is present, you “get” the same type the boss has. The tanks must each get the light and dark type. This means one of your tank needs to tank the light type and the other tank needs to tank the dark type. What types should the DPS get? It really depends on your party.
Either 1 tank be alone with 1 type and the rest can all be on the other type. Another option is to have 1 tank and 1 healer pair up to have the same type and the DPS can be on either type. There’s advantages and disadvantages on both situations.
Example how the types can be assigned.
First of all, there is a pattern that makes the boss teleport randomly to anyone with the same type. If the tank is the only one with, for example, a light type, the Luxior will always teleport to the tank, and shoot auras to the tank. This makes the tank’s life easier, because there are going to be less unexpected situations happening, and Luxior will have less mettle stacks, which makes it easier for an inexperienced tank. Another option available is to have 1 tank and 1 healer pair up and the DPS get any type. This helps the tanks get consistent heals, because the healer will always be close to the tanks, and will help 2 inexperienced healer keep their tanks up. It really depends on your party.
I personally like having 1 tank stay alone and have the rest DPS one boss at a time.
The boss skills are the following:
Luxior’s Skill Patterns
Horizontal Strike
Hits targets infront of the boss. Basically the front 180′ angle.
When Luxior uses this skill, the boss moves forward slightly. You need to pay attention so that the boss’s skill doesn’t hit your back, since the skill wouldn’t get blocked and will kill the tank.
Cross Quake
Creates a Cross shape mat that deals massive damage.
The Cross Attack’s cross mat is very large and can reach from one end to almost the other end so both tanks should be aware of this. Once the scale pattern happens, Cross Quake starts creating a star shaped mat instead of a cross one, so players must be careful where they stand.
It’s easier to position your camera like this to look at the floor from the top to easily see the shape.
The best way to dodge this skill is to move back a bit and look at the mat from the top (example shown above) and move out of the mat.
Summon Light
Notice that the boss channels twice.
Once the shield of the boss is gone, the boss enters the 2nd phase and will start be using this skill.
After the first skill channel, it will teleport to the main aggro. Every player with the same type needs to get close to the boss before this first channel ends or they will get hit by a purple Damage over Time attack that lasts for 10 seconds when the 2nd skill channel ends. This DoT damage hurts and prevents people from rezzing the dead, so everyone needs to pay attention to this.
If you fail and get the DoT damage, your healer should use mana barrier to keep the players with the DoT tick safe.
TL; DR: Players with the same type of the boss MUST get close to the boss or said players will gain 200% reduced healing. and DoT damage.
Vertical Strike
Also be careful so that the skill doesn’t hit your back.
Like Horizontal Strike, you want to back up slightly.
Luxior’s Aura
Shows you the skill pattern and how to prevent the aura from spawning.
When Luxior’s Aura happens, It randomly chooses someone who has the same type as the boss and shoots a light ball. When the light ball hits the target, it spawns a circle aura on the floor that deals damage to people in it. You can prevent the aura from spawning by getting hit by it while you are on the window shown above. Umbrael’s Aura is identical to this skill pattern. You can see what happens if the aura actually spawns in the Umbrael’s Aura section.
Chasing Lights & Cleanse Umbrael’s Aura
Randomly teleports to target and cleanses area.
After the first channel ends, Luxior randomly teleports to a player with the same type and later on cleanses Umbrael’s dark Auras that are towards the temporarily aggroed player. If you need to remove Umbrael’s Auras, the main aggro can move in front of an Aura so that Luxior can remove the aura. An example is shown above. Notice that the Shadow Aura disappears after the boss uses the skill.
Umbrael’s Skill Pattern
Umbrael seems easier to tank than Luxior, because Umbrael doesn’t move around while attacking unlike Luxior.
Impaling Strike
Hey, my group actually got to the 2nd boss day 1.
This is basically Umbrael’s version of Horizontal Strike. This skill can be blocked and you always want to get hit by the skill (still should block it), because this is the weakest skill. Once Umbrael uses this skill, it will consume its Mettle stack to deal increased damage (like how Luxior does with Horizontal Strike.)
Shadow Orb
Another “basic” attack of Umbrael
Consider this Umbrael’s version of vertical strike. You also want to get hit by this instead of dodging them, because it’s also one of the more weaker skills.
Lightning Strike
Spawns Lighting Strikes on the ground players with the same type.
The Lighting Strike attack will hit players close to the boss or the players that doesn’t have the Light type. It’s easy to dodge, so dodge it! Just make sure dodging takes higher priority than finishing your channeling of a skill.
Summon Shadows
Umbrael’s version of Summon Light.
After the first channel, it randomly teleports to one of the players with the same type. After the 2nd channel, it gives a purple Damage over Time attack that lasts for 10 seconds to everyone except the Tanks like Summon Light. Your DPS and healer should be close to each other and the healer should use Mana Barrier to prevent from dying from this. If you have the Dark type and don’t get close to Umbrael like how I did in the example above, you’ll get 200% reduced healing, so the only way to keep yourself safe from it would be using Mana Barrier.
Umbrael’s Aura
During this pattern, the boss can use another skill, so be careful!
After Aura patterns, the boss can use another skill. This example uses Shadow Beam.
After channel finishes, the boss shoots a big purple orb that randomly chases one of the players with the same type. When it hits the player, it spawns Umbrael’s Aura on the ground that you want to stay out of. I didn’t do it in the 1st example, but if you jump on top of the window pane on the side and get hit by the orb, the Aura will not get spawned on the ground. (Check 2nd example.)
Chasing Shadows & Cleansing Luxior’s Aura
If there’s any Luxior’s Aura, this will remove them.
These 2 skills are a pair. After teleporting to a random player with dark type, Umbrael starts erasing Luxior’s Auras that are on the ground close by the Umbrael. It’s helpful to use this to remove any Luxior’s Aura that are nearby.
Shadow Beam
Try move around the beam so that you don’t get hit by it.
This pattern is a bit tricky. As soon as the boss channels Shadow Beam, it spawns a rotating beam around its staff that players need to avoid. This beam is pretty long so if the two bosses are close, the other tank also had to be careful. Best way to counter this is to call out Shadow Beam as soon as you see the cast. and get ready to dodge it. If you can’t dodge it, run towards the beam and jump to avoid it. The last resort is to use invincibility.
If you get hit by it, you get a skull debuff and you get slowed for 20 seconds and get DoT ticks. This hurts, so do your best to not get hit by the beam.
Sometimes the boss uses the pattern twice in a row, so be careful.
Scale Pattern
This happens to both bosses at the same time.
After phase 1 where the boss loses it’s shield, it can do the so-called “Scale Pattern.” One of the bosses randomly teleports to the center of the room and on scales located on the left and right side of the room light up. The location of the dark and light type are random, which means the dark type can either all spawn on the left side or all spawn on the right side of the room. In the example above, I am tanking the light boss and the light scales were on the other side of the map, so I had to run all the way there.
As soon as the scale pattern happens, you want to locate your scale and activate it. If you fail to do so, you get hit by a DoT skill by the bosses. Tanks should have top priority on getting the closest scale, then it should be the healers that gets the closer scales (Since its easy to revive a dead DPS).
Once the scale pattern ends, your type swaps. Light becomes dark and dark becomes light. (People without type stay type-less will always get hit by the DoT skill.) This means that the tanks are going to swap and tank the opposite boss after the scale pattern. You’ll see me tanking the Light boss and swap to tanking the dark boss in the example above.
Tips about Boss Type and DPS
Until the the tank gains enough aggro, the extra DPS shouldn’t be hitting the bosses. We can’t see it in the video, but you can notice that the extra DPS does get an attack type by hitting a boss, before the boss loses its shield.
Regardless of the party composition, seems like it’s best to have all the party get the same type except the ones tanking. For example, 4 players will get light type and 1 tank will get the dark type.
You can notice the player “비콸” is waiting until the tanks are gaining enough aggro.
Key Points to beat the bosses:
DPS and do the patterns until both bosses has 5% HP (265,000 HP) left. To be safe, slow DPS when you get close and avoid AOE skills. When a boss hits 5% HP, it will go into sleep mode that heals the other boss up to 30% hp.You want both bosses entering sleep mode and burn both of them at the same time.Check the example below on how this works.
Basically all of the bosses’ attacks hurt, but the tanks need to get hit by the skills called “Horizontal Strike” and “Impaling Strike”. They are kind of like the bosses’ basic attacks. The reason behind this is whenever the tank dodges those skills, the boss gains a buff stack called ” How dare you dodge this? (어쭈 피해?)” that increases the boss’s received damage and damage by 30%.
Also the bosses gain Mettle stacks whenever it is hit and “Horizontal Strike” and “Impaling Strike” both deals consumes the Mettle stacks to deal extra damage. When the attack is blocked, 100k Mettle stacks seem to deal 10k more damage.
If your party members have big dick damage, but your tanks aren’t that tanky, your party needs to slow down DPS. Bosses with too high Mettle stacks can kill tanks that aren’t fully equipped to tank.
Luckily attacks from the bosses can be blocked, parried, and evaded, so the 2 tanks need to spec Defense with a shield and use Gale Shield Slam whenever available to dodge the bosses’ attacks. With block, the hits are manageable.
Because the boss starts with 10k shield at the start, (The video shows 50k due to it being done before the nerf.) the tanks can’t keep aggro from the healer. It’s important for the tank to use hard aggro skills like “Boastful Roar” and “Mocking Howl” to keep it from aggroing to the healer. It’s also important to make the boss face towards the wall so that it won’t accidentally hit other players.
Pro tip: You can notice that the main tank archer swapped to normal Endless Arrow. This is probably to prevent the GCD so that he can use his defense skills on time.
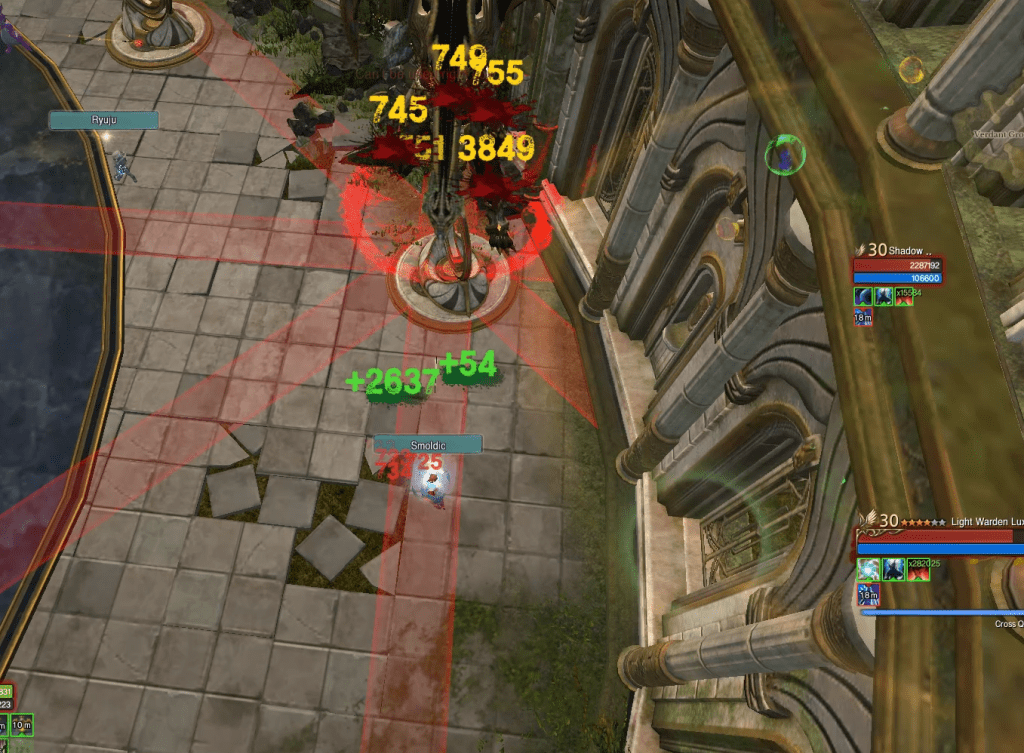
The End Game (Killing the Bosses)
This was our first kill lol
DPS both bosses down to 10% HP. Then, slowly chip down both bosses down to 5% HP. Do not use your nuke skill combo right now, because you will need to use that on the 2nd boss. Once one of the bosses gets stunned by reaching 5% HP, everyone needs to immediately go to the other boss and DPS the boss down before it heals the stunned boss. This example was when we first killed the bosses, so you’ll notice us DPSing the first boss down to 3% HP, but this is not needed.
So on April 2nd 2020, XL released the Hidden Story patch that briefly mentioned about NPCs being able to sell Erenor Infusions in exchange of Territory Coins.
Yes, I know you can craft Erenor Infusions using Territory Coins and other mats, but this new addition only required Territory Coins. People thought this might be a potential way to get cheaper Erenor experience compared to the traditional Ayanad Staff feeding method or crafting your own Erenor Infusion. We finally got some information about how many Territory Coins would cost you to get those Erenor Infusions and they aren’t looking great.
The Table
Grade
# of required Territory Coins
Arcane
50
Heroic
100
Unique
140
Celestial
190
Divine
250
Epic
320
Legendary
750
Mythic
1750
Eternal
2500
Characters can only exchange one Erenor Infusion per day from all the Territories you own. There’s also a limit of how many infusions that are available by that faction.
Some rough NA Math
So I bought a ton of Lord’s Coins for 35 gold per piece hoping it to be worth the investment. Heck even if it wasn’t really worth, I had enough time to sell them or even use a portion myself.
Legendary Infusions
Amount of gold you spend getting Legendary Erenor exp buying Infusions = 750 * 35 (How much I spent per coin) * 4 (staff gives about 8184 exp, but infusions gives u 2k) = 105,000 Gold.
It usually costs around 60,000 ~ 70,000 Gold for a 2H Ayanad Leggy Staff. (8184 exp)
So for buying Infusions to be equivalent in efficiency compared to staves, Lord’s Coins have to be around 20G ~ 23G which is definitely not the case in NA Legacy.
Divine Infusions
Amount of gold you spend getting Divine Erenor exp buying Infusions = 250 * 35 (How much I spent per coin) * 3.7 (staff gives about 7343 exp, but infusions gives u 2k) = 32,375 Gold.
It usually costs around 10,000 ~ 12,000 Gold for a 2H Ayanad Divine Staff. (7343 exp)
So for buying Infusions to be equivalent in efficiency compared to staves, Lord’s Coins have to be around 10G ~ 13G which is also not the case in NA Legacy.
Conclusion
So yeah, nothing else really left on my end. The hype that Erenor would become easier to make was just a hype and actually never was true. Once I get more information about other grade, I’ll update the table.
Charybdis boss is finally out. It’s an easy boss to kill, because it is very difficult to reset it. It spawns North East of Aegis Island on Thursdays and Sundays at 9:30PM EST (10:30PM EDT).
I had this post written a long time ago, but it’s finally public now.
Since it is very difficult to reset the boss, it is important to get the tag on the boss.
The spawn location is marked below with the red dot.
The coordinates for Charybdis is: W 5’54’ 5″, S 1’3′ 45″. (Double check please.)
Red dot is where Charybdis spawns.
It drops Charybdis gear by chance and always drops a trip gem as well as mats required for crafting a Charybdis gear and mats required for awakening raid boss gear.
If you want to kill this boss even with enemies contesting you, for fuck sake, spec defense when I’m telling you right now and focus on the objectives instead of fighting your enemy. Have a couple boats shooting the boss at all times so that, even if a boat sinks, your raid will still have other boats shooting on the boss to prevent it up resetting.
Patterns
Charybdis Patterns: Seems like most non aoe spells just targets the main aggro.
Dahuta’s Curse (다후타의 저주): After casting Dahuta’s Curse, everyone except the boat captains get a blue effect debuff and must go in water to get rid of the debuff. After some time, people with the blue effect gets dealt damage. Failing to remove this debuff spawns the Ghost NPC. Ally Ghost NPC interferes with boat movements and heals players and boats when interacted. Enemy Ghost NPCs also interferes movements. Both ally and hostile ghosts will get absorbed by Charybdis during the absorption pattern, and reduces boss stacks and must be killed or interacted.
Water Cannon (물대포): Boss tilts to one direction and shoots water. Drinks water first during casting and turns anti-clockwise 90′ and shoots it.
Uppercut (올려치기): Dives into the water momentarily and causes a whirl around which causes boats to get pulled around. This is why Turtle boats are great. Enoans are somewhat okay because they move less.
Body Slam (몸통 내려치기): After finishing cast, boss tilts to one direction and then slams to opposite direction. Seems to always attack the aggro target. By non-stop driving the boat, boats can dodge the attack.
Howling (하울링): Just some random attack spell?
Raksha (라크샤): A Levi-like mob appears temporarily and eats the boat and flies to the sky. This can happen any time once the boss’ HP drops lower to a certain threshold. A red effect pops up in the water and a Levi-like mob follows the red effect and one-shots the boats close to the aura that have low hp (Hunts boats if the boat’s HP drops to lower than approximately 50% of the its max HP).
Hunting (먹이사냥): During casting, it shoots a circle sonic beam toward its’s target. Once casting is over, it attacks its target. Doesn’t seem to drag it though.
Sea of Death (죽음의 바다): Kills everyone who is in the water. Stay on boat or use invincibility mount/glider/skill. (This is a guaranteed cast after Dahuta’s Curse) After casting, it creates a God’s Whip visual and instantly kills players. Can also be randomly casted.
Spit (뱉어내기): Spits out green stuff. I think it just does poison damage. Nothing important.
Extra Info:
At 10% the boss gets Enraged buff. (50% dmg increase and hp regen) This buff only happens once and doesn’t happen again which means the boss will never regen again while it has aggro.
Rule of thumb is to staying away at least 45m away from the boss while constantly moving. This helps avoiding patterns and boats would be less likely to collide with each other.
Charybdis Dahuta’s Curse Stack: Starts with 100 stacks. The less stacks Charybdis has, the stronger the boss becomes.
When Dahuta’s Curse has lower than 40 stacks, damages hit for 30k~40k and becomes like an instant kill mechanic like Sea of Death.
Stacks
So there’s two types of Ghost NPCs.
Ally Ghost NPCs spawn close to the main raid that aggro-ed the boss. If you purify these NPCs, it heals nearby allies and ally boats. These NPCs are a nuisance, because they block boats from moving freely and can trap boats.
Targettable Enemy Ghost NPCs (They don’t attack though.) also exist and spawn around enemy contesting players.
Charybdis uses a skill (Soul Absorption) every so often that absorbs these ally and hostile enemy ghost NPCs. Each ally or hostile ghost reduces Dahuta’s Curse stack from Charybdis which makes the boss stronger. So you need to do your best to interact with the ally ghost NPCs and kill the hostile ones if you are trying to kill Charybdis.
When the boss resets, this stack doesn’t immediately go back to 100, but it eventually does reset back to its original 100 stack.
Killing the Boss
As long as you have enough boats and people with an actual non-decorative brain, killing Charybdis is very – and I repeat – very easy. The boss is very difficult to reset, because the boss is stationary. It has no chasing mechanic like Kraken, so as long as, at least 1 person in the whole fucking raid is aggroed to the boss, Charybdis will never reset. Doesn’t even have to be siege damage, just hit the boss to keep the aggro.
Don’t spec sooth. You’re god damn useless. The respawn Nui is right next to the boss. If you specced Soothsayer, you literally wasted a skill class that could’ve been either Auramancy or Defense which are great for survivability or mobility. With Sooths in the raid, people are also not going to respawn right away after they died. This makes them have to wait longer for their rebirth to wear off. You are the ones that are fucking up the whole raid.
Spec Defense. Even the most talented players benefit off of invincibility when they are in the water during Sea of Death. And I know there’s a bunch of washed up players that think they are too cool to spec Defense.
This boss is a fucking PVE boss. Stop wandering around to kill people. Get 2~3 boats ready for each driver and just ignore the contesting raid. Non-stop dps the boss and have a group of players to kill the hostile Ghost NPCs. Always interact with ally NPCs whenever you have the opportunity. Do not PVP. It’s pointless. A competent raid is going to have players constantly hitting the boss and eventually this boss will die, because, I mean, it only regens once.
When a boat dies, just rotate through your other boats. By the time your last boat dies, you’ll have your first boat up.
Get Strength of the Faction for shorter Rebirth timer.
Contesting the Boss
Uhh good luck. Do your best to ram all the boats.
You could also actively kill the players that are trying to kill your ally Ghost NPCs (Hostile to the attempting raid.) That way, you can reduce the boss’ stacks to make every hit one shot players.
Ideal play is to tag the boss on spawn and literally just keep it your tag.