
Got some Ipnysh Sacntuary (Golden Shrine) boss videos that you guys might be interested in. The 2nd boss and the 4th boss are the hard ones with the 2nd boss being the hardest.
Thanks to Kimnuts for making the videos that I referenced to write up the guide!
This room consists of 4 mini bosses that all have different mechanics. Before you start, the runs are much easier if your healer can rez quickly.
Basic Skills
The boss skills are the following:
Stomp (대지 밟기)
The boss does a couple jumps and the last jump is the high jump. When the Taurus’ last jump is about to land, players can jump to dodge this mechanic. Seems to have about a 15m range.
Charge (돌진)
Melees behind the boss needs to back off when it does the charge. It also hits players that aren’t on the mat if they are behind the boss.
Back Kick (뒷발치기)

Hits targets behind the boss. Pretty simple.
Rear Kick (올려 차기)

Hits targets in front of the boss. Main aggro should avoid the attack using mobility skills like backdrop.
1-1 Agile Taurus
First of all, all the boss skills can be used while standing still and even when it’s moving. It is crucial to make sure you can recognize the actual physical motions of the boss for each of the skills. In future phases, clones of the boss spawn and it’s hard to check their casting bars, so you need to memorize the visuals of each pattern.
This boss is pretty easy as long as you have witchcraft. Bubbles can be used to lift the Rapter mobs (explained below when it spawns) and the nearby towers will kill the rapters for you. Basically you need to dodge the rapters while kiting the Taurus. Honestly, you can do the entire first room without a healer at all. If you die too much, spec defense or spec witchcraft, or get more mobility.
Once the boss has 80% HP, it spawns Rapters that only take 1 damage from your attacks. You need to align yourself so that the boss attacks hit the Rapters. Or you can just lift the Rapters will CCs like Bubble and the surrounding towers will attack the Rapters.
Try not to get lifted, because those towers will also hit you.
Once the boss has 40% HP, it will spawn a clone of itself which disappears in 40 seconds. The clone also can lift you so be careful. The purple traps in the middle lifts you up if you stand on it so be aware.
The easiest way to deal with the clone is to spawn a healing circle right where it’s supposed to spawn and make the clone aggro onto the healing circle at the start. If not possible, you can just ignore it and full DPS the boss.
1-2 Sturdy Taurus
If you get hit by the boss’ Sunder Earth, you will most definitely insta-die. (Unless you have a fuck ton of HP.) The main aggro just needs to move away from the boss and avoid the Sunder Earth.
When the boss hits 70% HP, it spawns suiciding robots. If you hit them, they explode and causes an AOE trip around itself. It’s stationary when spawns, but later on moves, so kill them asap. You can notice that the boss acts up weirdly if the main aggro dies. This is fixed in our version, so do not worry about it.
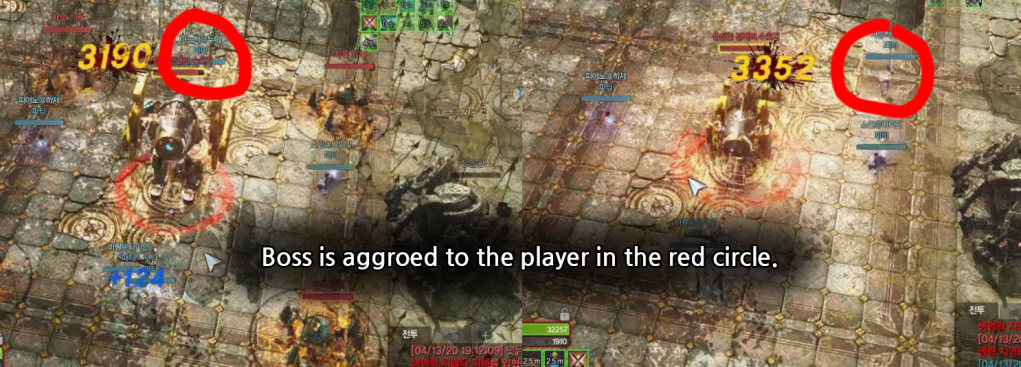
When the boss hits 40% HP, it spawns a clone that also does the same thing. The clone is immune to damage so it will eventually always get aggroed to the healer. But when it first spawns, it will initially aggro to whoever is closest to the clone. The aggro will eventually change to the healer, so the healer needs to heal while kiting the clone. Again, you can also use healing circle for this clone to dodge the whole mechanic.
1-3 Fortified Golem
For this boss, you also just have to be careful with the aggro. When the boss spawns, stick to the center of the map, so that the boss doesn’t move to somewhere else.

At the start, out of the 9 quadrants of the map thorns spawn on all the quadrants except the center one. These thorns will trip you if you get hit.
This boss has 2 patterns and you only have to pay attention to one of the pattern. The boss’s normal attack is a shock attack and the boss shoots the attack towards the main aggro. If you get hit by it, you get pushed and tripped, so you need to avoid it by doing long stutter steps. You can see it how it’s done below.
The shock attack has a mini skill channel at the start and immediately starts a slightly longer skill channel. When the 1st mini channel ends, move to the side. Once the 2nd skill channel ends, go back to where you were.
Occasionally the boss spawns suicide robots on the 4 corners of the center quadrant so stay away from it. These suicide robots seems to blow up when it gets aggro.
When the boss reaches 60% HP, the thorns on the ground swap and only spawns at the center of the map. It also spawns the Mechanoid Hog looking boss clone you saw from 2nd phase of the 1st stage. Like the previous phase, this boss clone only gets aggro from the healer, so the healer needs to kite the clone.
At 40% HP, the thorns now spawn on the outer quadrants, so get back inside. The clone could still be alive depending on the amount of your DPS. If it is still alive, whoever has the aggro of the clone needs to kite the clone. Also again, you can use healing circle to dodge this mechanic.
Suicide bots will now spawn again on the outer quadrants, so a DPS (preferably an archer with missile rain) needs to blow them up to make the healer’s life easier.
During the entire time, the main aggro just needs to kite the shock attack.
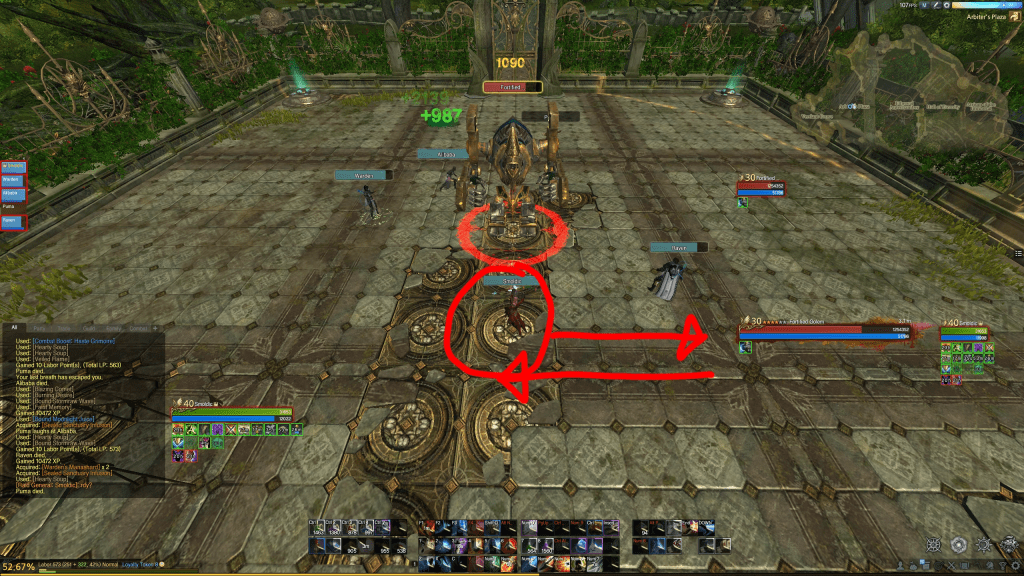
How to kite the Shock Cannons

1-4 Reinforced Taurus
So finally the 4th phase boss in level 1. Over all the patterns are identical to the 1st phase, but it uses Sunder Earth (that one shots people). Luckily it doesn’t spawn the rapters. Instead is spawns the suicide bots.
At the start, there’s no special pattern. Just look at the boss’ movements and react accordingly.
At 85%, a clone from the phase 2 spawns. Remember you need to pay attention with the clone as they can also do patterns. It can use Sunder
At 75%, 2 clones from phase 1 spawn. As always clones eventually aggro to healers, so its crucial for the healers to position correctly so that the clone attacks don’t hit the DPS.
At 50%, 2 clones spawn from phase 2, but they stay stationary and only uses Sunder Earth. This will one shot you. The best way to react to this pattern is to make whoever aggroed by these clones stay at the middle, so that the Sunder Earths won’t go on some weird direction. This helps your party members significantly, because now people can predict where the Sunder Earths are going to land.
At 20%, 1 clone from phase 4 spawns. It basically does all the patterns. Basically assume that all the clones will to all the patterns, since there’s too many clones in the map. Clones do disappear after 40 seconds since they are spawned though.
Damn the boss is too hard!
Hey, if the boss is too hard, whenever clones spawns, stop DPS entirely and kite patterns until the clones go away. After then, revive the dead, and continue with the boss.
